Geometry in Perspective:
By clicking the photo you can then see the image at its full size.

My Anamorphic 3-D Drawing Project:
|
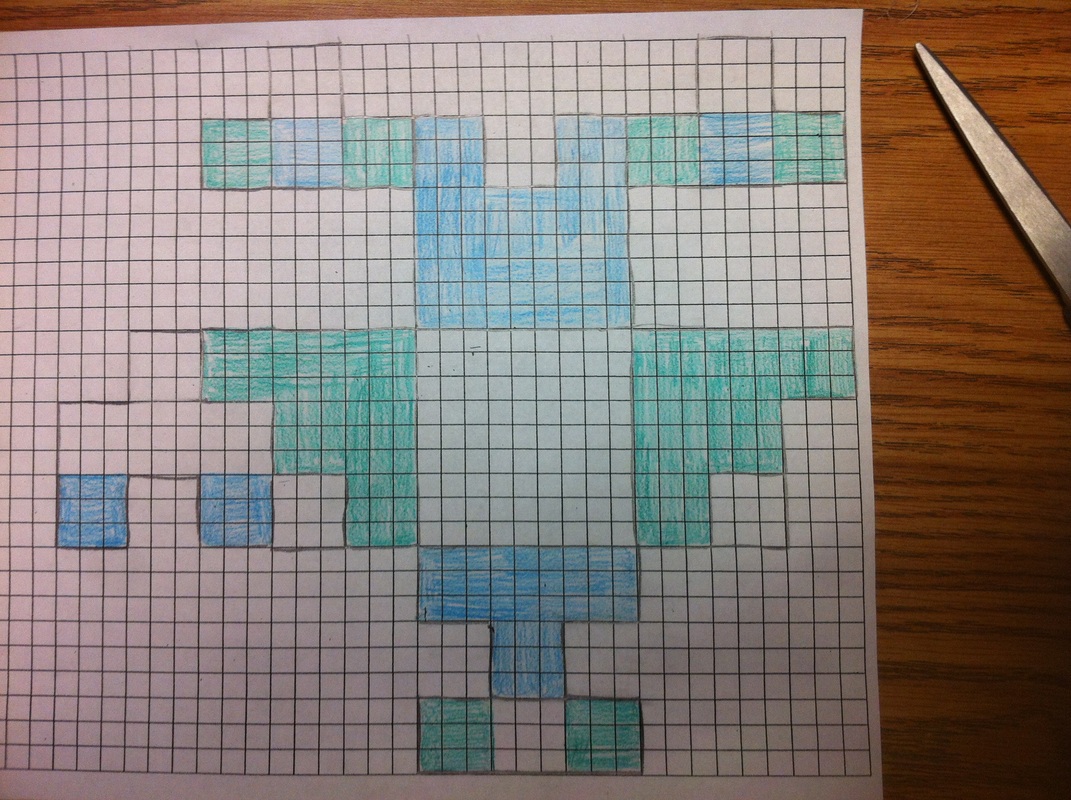
Our Original Picture:
|
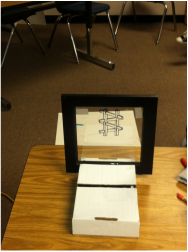
Our set up:
|
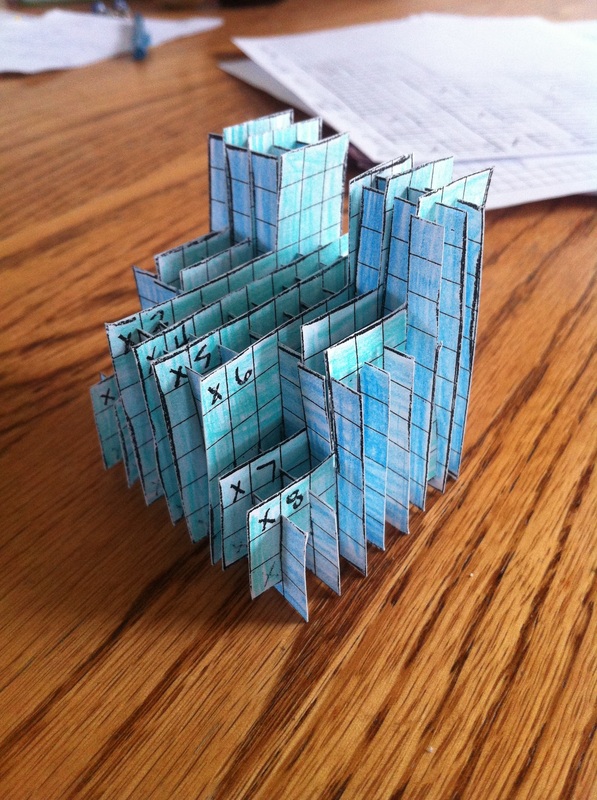
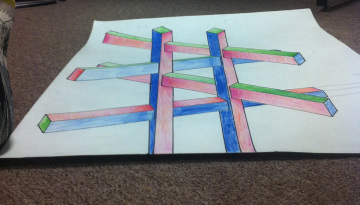
Our Final Anamorphic drawing:
|
In mathematics Geometry is the shapes, space, size, and relative positions of figures, but in this project we took all of these things to a new perspective. Anamorphics is literally looking at an object with a different perspective or creating your own perspective. This new perspective is a distortion of an original image and can only be seen correctly from one place. When we had to create an anamorphic drawing there were required supplies to help us be successful. One of my group mates cut a box that held a picture frame that was just glass that we would look through. We needed a poster board to put our anamorphic drawing and also an expo mark to use on our glass picture frame. We could have used a laser pointer to help us with projecting our imageon to our poster board. With one person always sitting the same way and the same distance away from the picture frame and another person sitting down by the poster board we were able to work together to create this project. When we first started this project we just worked with major points, vertices, or corners and the person on the floor would move the pencil around to where the looker was saying the point should go. We had a lot of problems with this and would forget which points were which. Then we decided that we needed to draw the first two up right posts to figure out where the other posts would eventually go. This worked out well for us because we now know which post we were working on and could more easily set up our poster to match the image drawing on the picture frame. Our project turned out great in my eyes, was a blast to do in a group, and gave me a whole new perspective on Geometry.
One and Two Point Perspective labs-
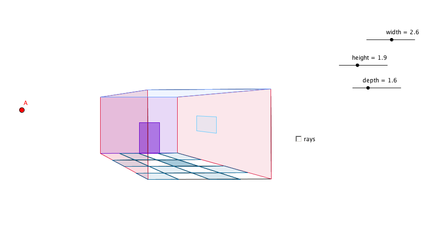
Two point perspective
|
One point perspective
|
Trigonometry- Angle of Elevation:
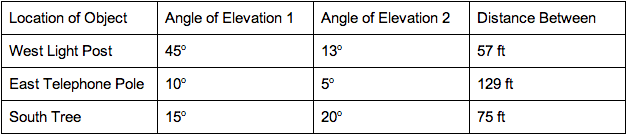
East: Telephone Pole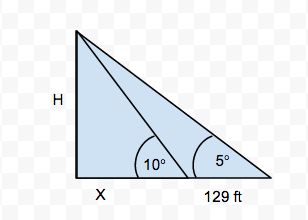
Equation:
|
South: Tree
Equation:
|
West: Light Post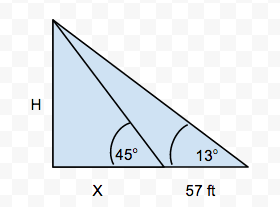
Equation:
|
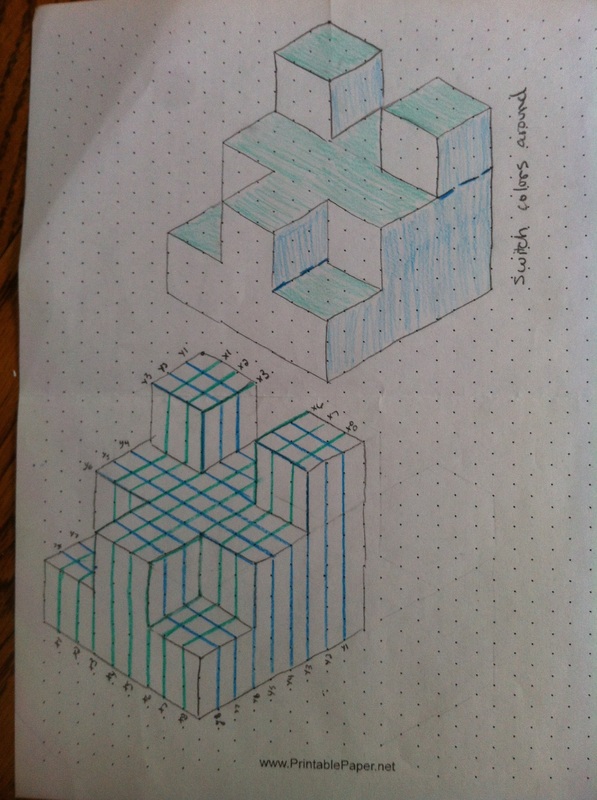
Hexaflexagon:
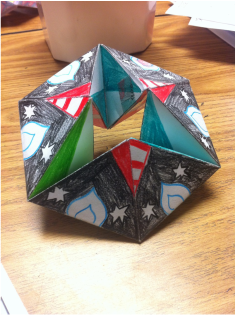
To create our hexaflexagons and make them beautiful, we had to use line-reflective symmetry and rotational symmetry. When you look at the three diamonds that make a single side you will see that they are the same pattern even though they may vary in their hue. In one of the diamonds it will be using line-reflective symmetry that splits it into two triangles that are reflections of each other. The rotational symmetry occurs with the bow tie effect, which is when our hexaflexagon is being turned. An edge of a single diamond is rotated and reflected so that it matches the congruent diamond's side. My favorite side of my hexaflexagon is the side that is shown on the left . I like this side the best because it is the most complicated and makes cool designs when rotated both ways. I think I could have made it even better though by measuring and making each diamond more symmetrical. I learned through this project was that I loved being able to create a physical project, not just on paper, that incorporated everything that I had learned.
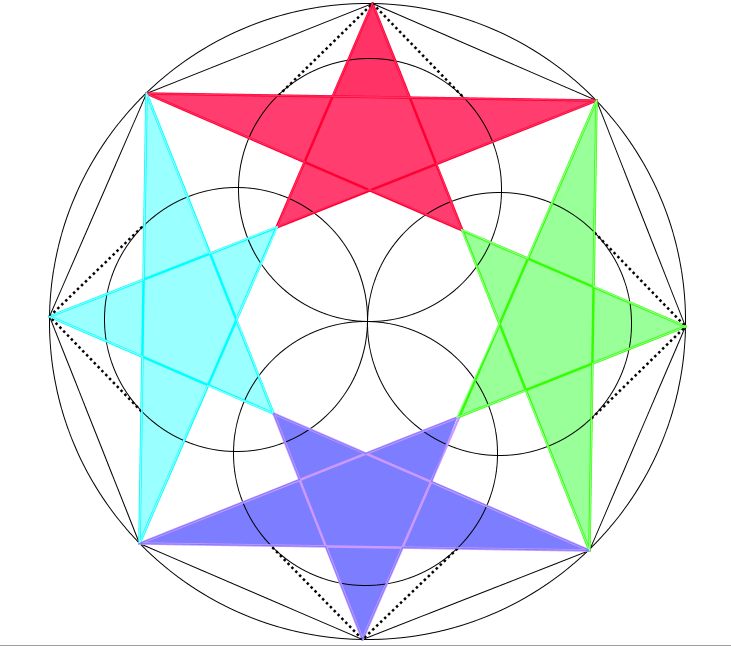
Snail Trail Lab:
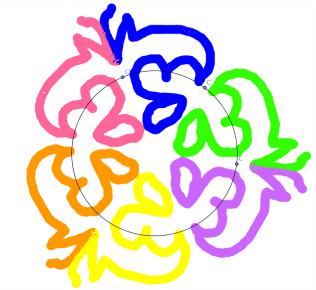
In the process of creating the snail trail lab we actually had to use geometry to create the the stunning picture you see to the right. If you look from one color and the trail it took and look at a different color next to it, you can visualize an invisible line that either color could reflect over and be in the same spot as the other color. The thin out line of a circle, that may be hard to see, was our starting point. We split the circle into six sections, making each of the section's inner angle 60º. Then we placed a point D (in my case is the blue) and then reflected it over each of the lines so that we then had six different points, one in each section. I really enjoyed creating this lab because it was super fun and interesting to see how simple geometry can make beautiful art.
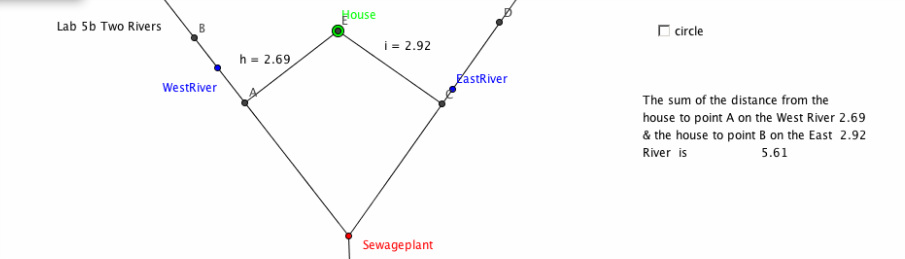
Two Rivers GGB Lab:
We will model the following scenario in a Geogebra sketch. There is a sewage treatment plant at the point where two rivers meet. You want to build a house near the two rivers (upstream from the sewage plant, naturally), but you want the house to be at least 5 miles from the sewage plant. You visit each of the rivers to go fishing about the same number of times but being lazy, you want to minimize the amount of walking you do. You want the sum of the distances from your house to the two rivers to be minimal, that is, the smallest distance.
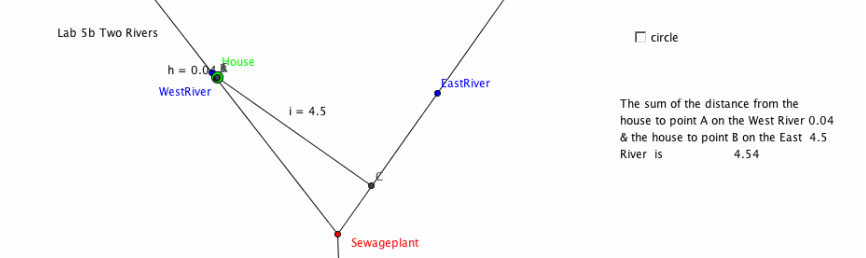
This would not be the best spot for you to live because it does not follow the requirements of living in a spot where it is the shortest to get to both of the rivers. Though the house is on the perpendicular lines for both the West and the East river it is not the shortest distance.
This is one place you could put your house and would be able to have the shortest distance to walk to both of the rivers. You could also place your house on the east river and you would still have the shortest distance. Which ever river you choose to live on you will still be on two invisible perpendicular lines from both river.
Burning Tent Lab:
A camper out for a hike is returning to her campsite. The shortest distance between her and her campsite is along a straight line, but as she approaches her campsite, she sees that her tent is on fire! She must run to the river to fill her canteen, and then run to her tent to put out the fire. What is the shortest path she can take? In this exploration you will investigate the minimal two-part path that goes from a point to a line and then to another point.
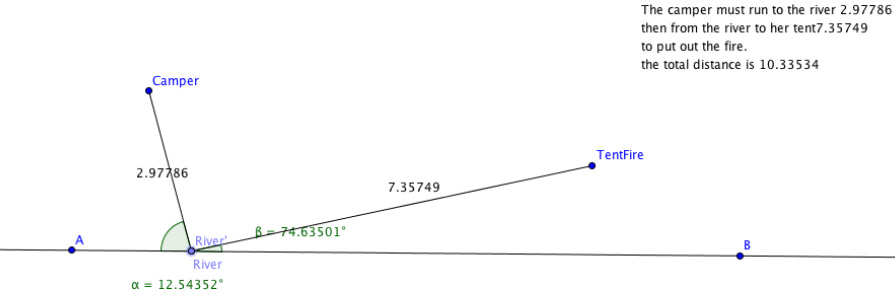
This would not be a place that she could fill her bucket and and get back to her tent the fastest, there for it is not a good idea for her to get water here if she wants to put her tent out. There is really only one spot where she can go to to fill up her bucket the fastest and get back to her tent, which is demonstrated in the next picture.
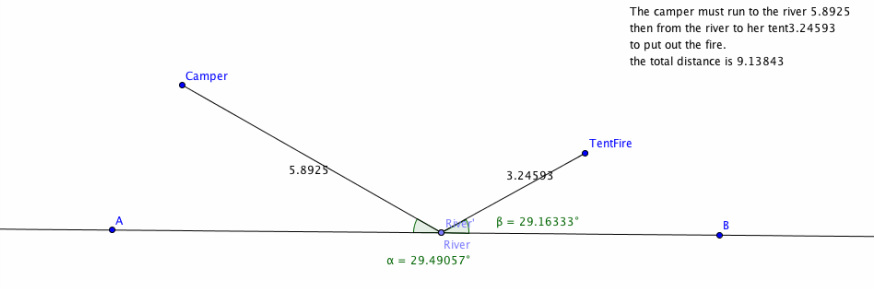
This would be the correct place for her to fill her bucket. Where she would go to the river in the picture above would be the shortest distance so she could get back to her tent. When trying to find the shortest distance from one spot to a line to another spot, there is one simple rule or step that you have to take without having to find the distances and moving your point all over the line till you find the right spot. All you have to do is find the angles from the place that your coming from to the line and then going to from the line. When these angles are equal you will have found the shortest distance to where you are trying to go!
Constructing a design: